
The Rain Dial is a reliable irrigation controller designed for efficient water management. Part of the RD600 series by Irritrol, it offers user-friendly programming and advanced features for residential and commercial use. Known for its durability, the Rain Dial supports up to 12 stations and integrates seamlessly with rain sensors, ensuring smart watering solutions while conserving water.

Rain Dial Models
The Rain Dial series by Irritrol offers a variety of models designed to meet different irrigation needs; The RD-600, RD-900, and RD-1200 are the primary models, each supporting 6, 9, and 12 stations respectively. These models are available in both indoor and outdoor configurations, ensuring flexibility for various installations. The RD-600 is ideal for smaller landscapes, while the RD-1200 is better suited for larger properties with more zones.
The Rain Dial Plus and Rain Dial-R models are advanced versions, featuring additional functionalities such as rain delay and sensor compatibility. The Rain Dial-R includes a built-in transformer and battery backup, ensuring continuous operation during power outages. All models are compatible with rain sensors, allowing for water conservation by automatically pausing irrigation during rainfall.
Each model comes with a detailed manual and programming guide, making setup and operation straightforward. The RD-600 series is known for its durability and user-friendly interface, making it a popular choice among homeowners and professionals. Whether you need a basic irrigation system or an advanced setup with smart features, the Rain Dial series has a model to fit your requirements.
For more information on specific models, refer to the PDF manuals and user guides available on the Irritrol website. These resources provide detailed instructions for installation, programming, and troubleshooting, ensuring optimal performance of your Rain Dial controller.
Installation Guide
Installing the Rain Dial controller requires careful planning and adherence to the provided instructions. Begin by selecting a suitable location for the controller, ensuring it is protected from weather conditions and within 5 feet of a 120V AC power outlet. Use the mounting template to mark the installation area, preferably in a garage or similar sheltered space. Avoid installing it on the same circuit as high-power appliances like refrigerators or air conditioners.
Next, mount the controller using the provided screws or brackets. Ensure the unit is level and securely fastened. Connect the transformer to the controller, following the wiring diagram in the manual. For outdoor models, connect the unit to a weather-resistant outlet. valve connections should be made according to the zone layout, ensuring wires are properly labeled and connected to the correct terminals.
For rain sensor integration, route the sensor wires through the valve wire opening and connect them to the designated sensor terminals on the controller. Remove the jumper wire before connecting the sensor to prevent wiring conflicts. Once all connections are secure, plug in the transformer and test the system manually to ensure all valves operate correctly.
Refer to the Installation Manual for specific details, especially for models like the RD-600, RD-900, and RD-1200. Additional resources, including PDF guides and troubleshooting tips, are available on the Irritrol website to assist with any installation challenges.

Programming the Rain Dial
Programming the Rain Dial controller is a straightforward process designed to meet your specific irrigation needs. Begin by accessing the programming menu, which allows you to set start times, watering days, and duration for each zone. Use the navigation buttons to cycle through the options, and the dial to adjust settings. The controller supports multiple programs, enabling flexible scheduling for different areas of your lawn or garden.
Start by setting the current time and date, as this ensures accurate scheduling. Next, select the number of active stations and assign each to a specific zone. For each station, set the start time, watering duration, and frequency (e.g., daily, every other day, or specific days of the week). The Rain Dial also features a Rain Delay option, which postpones watering for up to 9 days, ideal for conserving water during rainy periods.
Manual operation is easily accessible by pressing the manual button, allowing you to test valves or run a quick watering cycle. For seasonal adjustments, use the Seasonal Adjust feature to increase or decrease watering times without altering the base schedule. Advanced settings, such as valve operation and sensor integration, can be configured through the menu for optimal performance.
Refer to the Programming Guide or online tutorials for detailed step-by-step instructions. The controller’s intuitive interface ensures that even complex schedules can be set up efficiently. Proper programming not only ensures your lawn receives the right amount of water but also helps in conserving this valuable resource.
Troubleshooting Common Issues
Troubleshooting the Rain Dial controller is essential to ensure optimal performance and address any operational issues promptly. Common problems include a blank display, non-operational valves, or error messages like “FUS,” which indicate a short circuit in a valve station. If the display is blank, check the power connections, ensure the transformer is functioning, and verify that the 2A fuse is intact. For valves that fail to operate, inspect the wiring for damage, ensure valves are properly connected, and check for closed isolation valves.
The “FUS” error typically points to a short circuit in one of the valve stations. To resolve this, disconnect the valve wires from the controller and test each station individually to identify the faulty valve. Once located, repair or replace the damaged valve or wiring. Other issues, such as inconsistent watering schedules, may be due to incorrect programming. Review your settings to ensure start times, watering days, and durations are accurately configured.
For sensor-related issues, verify that the rain sensor is properly connected and configured. Refer to page 10 of the user guide for detailed sensor operation guidelines. If problems persist, consult the DIY Troubleshooting section of the manual or visit the manufacturer’s support website for additional resources. Regular maintenance and system checks can help prevent many of these issues, ensuring your irrigation system runs smoothly and efficiently.
- Blank Display: Check power connections and fuse.
- Valves Not Operating: Inspect wiring and valve connections.
- “FUS” Error: Identify and repair short-circuited valves.
- Sensor Issues: Ensure proper installation and configuration.
By addressing these common issues promptly, you can maintain the performance and reliability of your Rain Dial controller.

Maintenance Tips
Regular maintenance is crucial to ensure the Rain Dial controller operates efficiently and prolongs its lifespan. Start by inspecting the controller and its components periodically. Clean the exterior and interior of the cabinet to remove dust and debris, which can interfere with electrical connections. Use a soft cloth and avoid harsh chemicals to prevent damage to the unit.
Check the battery every 6 months, especially during power outages, to ensure it retains the time and date. Replace the battery every 3-5 years or when the low-battery indicator appears. Inspect the wiring and connections for signs of wear or corrosion. Tighten any loose connections and replace damaged wires to maintain proper functionality.
Regularly test the rain sensor to ensure it operates correctly. A malfunctioning sensor can lead to overwatering or underwatering. Clean the sensor head to remove dirt or debris that might block its operation. For outdoor units, ensure the controller is protected from extreme weather conditions, such as direct sunlight or heavy rain, which can damage the electronics.
- Inspect and clean the controller periodically.
- Check and replace the battery as needed.
- Verify wiring and connections for integrity.
- Test and clean the rain sensor regularly.
- Protect outdoor units from harsh weather conditions.
By following these maintenance tips, you can ensure your Rain Dial controller remains reliable, efficient, and continues to provide optimal irrigation control for years to come.
Connecting a Rain Sensor
Connecting a rain sensor to your Rain Dial controller is a straightforward process that enhances your irrigation system’s efficiency. The Rain Dial Plus model is specifically designed to work with a normally-closed rain sensor or rain switch, ensuring that watering schedules are automatically adjusted based on rainfall.
To begin, route the two wires from the rain sensor into the controller cabinet through the valve wire opening. This ensures that the sensor’s connections remain protected from the elements. Once the wires are inside the cabinet, locate the sensor terminals on the controller. You will typically find a jumper wire connected across these terminals, which needs to be removed to accommodate the sensor connection.
After removing the jumper wire, connect each of the sensor wires to the appropriate terminals. It’s important to ensure that the wires are securely fastened to maintain a reliable connection. Once the physical connections are made, refer to the controller’s programming menu to enable the rain sensor feature. This step ensures that the controller recognizes and responds to signals from the sensor.
Finally, test the rain sensor by simulating rainfall or waiting for natural precipitation to occur. Observe the controller’s response to ensure that it is prolonging or cancelling the watering schedule as expected. This verification step is crucial to confirm that the sensor and controller are communicating effectively.
By integrating a rain sensor with your Rain Dial controller, you can optimize water usage and ensure that your lawn or garden receives the right amount of water, even in varying weather conditions.
Understanding the User Interface
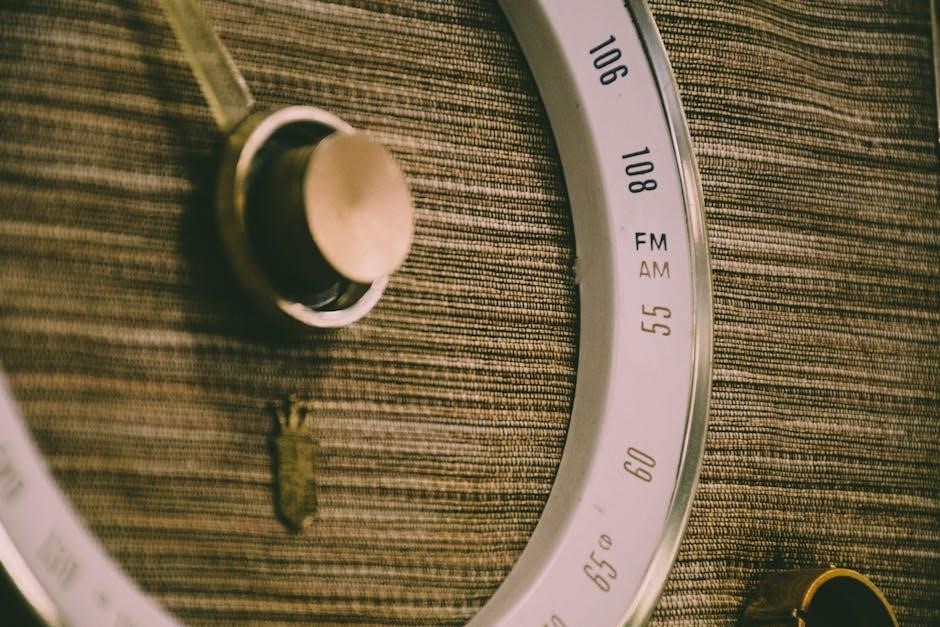
The Rain Dial controller features an intuitive user interface designed to simplify programming and operation. The interface includes a clear LCD display and a set of push buttons that allow for easy navigation and adjustments. The LCD screen provides essential information such as the current time, date, and active programming settings, while the buttons enable users to scroll through menus, select options, and confirm changes.
The primary buttons on the Rain Dial include the “Program” button, which accesses the main programming menu, and the “Manual” button, used to initiate immediate watering for selected stations. The “Next” button allows users to cycle through programming options, while the “+” and “-” buttons adjust values such as watering times and days. These buttons are clearly labeled and positioned for ease of use.
The interface also provides visual feedback during setup and operation. For example, when programming water start times, the display will show the selected time and station number. This ensures that users can verify their settings before saving them. Additionally, the controller includes LED indicators that signal active operations, such as when a station is running or when a rain sensor is engaged.
Overall, the Rain Dial’s user interface is designed to be user-friendly, making it accessible to both first-time users and experienced professionals. The combination of a straightforward layout, clear visual cues, and logical menu structure ensures that users can quickly and confidently manage their irrigation system. This intuitive design minimizes the learning curve, allowing homeowners and landscapers to focus on optimizing their watering schedules rather than navigating complex controls.
Power Management
The Rain Dial irrigation controller is designed with efficient power management to ensure reliable operation while conserving energy. It operates on a standard 120V AC power supply, with an optional 230V or 240V configuration for international models. The controller also includes a built-in battery backup system, which maintains the time and date during power outages, ensuring uninterrupted scheduling. However, the battery does not power the sprinkler valves, so an external power source is required for valve activation.
For energy efficiency, the Rain Dial features low-power consumption modes that minimize energy usage when the controller is idle. This eco-friendly design helps reduce overall power consumption without compromising system performance. Additionally, the controller’s advanced programming options allow users to customize watering schedules, further optimizing energy and water use.
The power management system includes safety features such as surge protection and thermal overload prevention, safeguarding the controller from electrical damage. Users are advised to install the Rain Dial on a dedicated circuit to avoid interference with other high-power appliances. Proper wiring and connections are critical to ensure stable power supply and prevent malfunctions.
Overall, the Rain Dial’s power management system is robust and energy-efficient, providing users with a reliable irrigation solution while minimizing environmental impact. Regular checks of power connections and battery status are recommended to maintain optimal performance.

Wiring and Valve Connections
Proper wiring and valve connections are essential for the smooth operation of your Rain Dial irrigation controller. The controller supports up to 12 stations, with each station connected to a specific valve. To ensure reliable performance, follow the wiring guidelines carefully.
- Wire Connections: Use high-quality, insulated wire to connect the controller to the valves. The common wire (usually white) should be connected to the “COM” terminal on the controller and to the common terminal on each valve. Station wires (color-coded) connect the controller’s station terminals to the corresponding valve solenoids;
- Sensor Integration: If using a rain sensor, route the sensor wires into the controller cabinet through the designated wire opening. Remove the jumper from the sensor terminals and connect the sensor wires securely to ensure proper operation.
- Valve Wiring: Ensure all valves are properly wired and connected to the controller. Verify that the valves are compatible with the controller’s output and that all connections are secure to avoid short circuits or malfunctions.
- Safety Precautions: Always disconnect power to the controller before performing any wiring or valve connections. Avoid sharing the controller’s circuit with high-power appliances to prevent electrical interference or damage.
- Testing: After completing the wiring, test each valve to ensure it activates correctly. Check for leaks or improper connections, and verify that all stations function as programmed.
By following these steps, you can ensure your Rain Dial system operates efficiently and reliably. Proper wiring and valve connections are critical for maintaining precise control over your irrigation system and minimizing potential issues.
Water Conservation Features
The Rain Dial irrigation controller is designed with advanced water conservation features to help reduce water usage while maintaining healthy landscapes. These features ensure that your irrigation system operates efficiently, minimizing waste and optimizing water application.
- Rain Sensor Compatibility: The Rain Dial works seamlessly with rain sensors to automatically pause irrigation during rainfall, preventing overwatering and saving water.
- Rain Delay Function: This feature allows you to postpone scheduled watering for up to 9 days, giving the soil time to absorb existing moisture and reducing unnecessary watering.
- Multiple Start Times: Program multiple start times for each watering cycle to apply water in shorter, more frequent intervals. This reduces runoff and allows water to penetrate deeper into the soil.
- Cyclic Irrigation: For larger landscapes, the Rain Dial can cycle through all stations in a sequence, ensuring even water distribution and preventing system overload.
- Smart Watering Adjustments: Adjust watering times based on soil type, slope, and sun exposure to deliver the right amount of water to each area, eliminating overwatering.
- Seasonal Adjustments: Modify watering schedules seasonally to account for changing weather conditions, ensuring plants receive only the water they need during different times of the year.
These water conservation features make the Rain Dial an eco-friendly choice for homeowners and professionals alike, helping to protect natural resources while maintaining lush, healthy landscapes.
Safety Precautions
When working with the Rain Dial irrigation controller, it is essential to follow safety precautions to ensure safe installation, operation, and maintenance. These guidelines help prevent potential hazards and protect both the user and the system from damage.
- Electrical Safety: Always disconnect the power supply before performing any maintenance or repairs. Ensure the controller is unplugged or the circuit breaker is switched off to avoid electric shock or injury.
- Weather Protection: Install the Rain Dial in a sheltered location, such as a garage or under an eave, to protect it from direct exposure to rain, snow, or extreme temperatures. Outdoor models are weather-resistant but should not be submerged in water.
- Proper Wiring: Follow the wiring diagram provided in the manual. Incorrect connections can cause system malfunctions or electrical hazards. Use only approved wires and connectors to ensure safe operation.
- Valve Safety: Before connecting valves to the controller, ensure the system is depressurized and the main water supply is turned off. This prevents sudden water discharge during installation or maintenance.
- Avoid Overloads: Do not connect high-power devices to the same circuit as the Rain Dial controller. Overloading can cause electrical fires or damage to the system.
- Use Genuine Parts: Only use Irritrol-approved replacement parts and accessories. Using unauthorized components can void the warranty and pose safety risks.
- Regular Inspections: Periodically inspect the system for signs of wear, corrosion, or damage. Address any issues promptly to prevent accidents or water waste.
- Follow Local Codes: Adhere to local electrical and plumbing codes during installation and operation. Ensure all work is performed by a qualified professional if required by law.
By adhering to these safety precautions, you can ensure the Rain Dial operates safely and efficiently, providing reliable irrigation control for years to come.
Glossary of Terms
Understanding the terminology associated with the Rain Dial irrigation controller is crucial for effective operation and troubleshooting; Below are key terms commonly referenced in the manual and related documentation.
- Controller: The central unit of the irrigation system that regulates watering schedules and valve operations.
- Station: A specific zone or area in the irrigation system, controlled by a valve. The Rain Dial supports up to 12 stations.
- Valve: A device that controls water flow to a station. It is typically connected to the controller via wires.
- Sensor: A device (e.g., rain or moisture sensor) that provides feedback to the controller to optimize watering based on environmental conditions.
- Program: A set of instructions defining watering schedules, including start times, durations, and frequencies.
- Start Time: The specific time when watering begins for a program.
- Watering Days: The days of the week or intervals on which irrigation occurs.
- Manual Mode: A feature allowing temporary override of scheduled programs for one-time watering.
- Rain Sensor: A device that detects rainfall and pauses irrigation to prevent overwatering.
- Fuse: A protective device that interrupts power to the system in case of an electrical overload or short circuit.
- Transformer: A component that converts household voltage to the low voltage required by the controller.
- Short Circuit: An unintended electrical connection that can cause system malfunction or damage.
- Valve Wire: The wire connecting the controller to the valves, enabling communication and control.
These terms are essential for understanding the operation, installation, and troubleshooting of the Rain Dial controller. Familiarizing yourself with this glossary will enhance your ability to use the system effectively.
The Rain Dial irrigation controller stands out as a dependable and efficient solution for managing watering systems. Its user-friendly interface, robust features, and compatibility with advanced sensors make it a top choice for both residential and commercial applications. By following the guidelines in this manual, users can ensure optimal performance, water conservation, and extended system longevity.
Whether you’re a homeowner seeking to maintain a lush lawn or a professional managing large-scale irrigation, the Rain Dial offers the flexibility and reliability needed to meet diverse needs. Its programming capabilities, troubleshooting support, and energy-efficient design underscore its commitment to innovation and sustainability.
Regular maintenance and proper installation are key to maximizing the controller’s potential. By adhering to the recommendations outlined in this manual, users can prevent common issues and ensure seamless operation. Additionally, the availability of comprehensive resources, including manuals and troubleshooting guides, provides assurance that assistance is always accessible.
Additional Resources
For further assistance with your Rain Dial irrigation controller, numerous resources are available to ensure optimal use and troubleshooting. The official Irritrol website (www.irritrol.com) provides comprehensive product literature, including PDF manuals, installation guides, and programming tutorials. These documents are accessible in multiple languages and can be downloaded for quick reference.
Additionally, the website offers detailed troubleshooting sections and DIY guides to address common issues. Users can find specific instructions for models like the RD-600, RD-900, and RD-1200, ensuring tailored solutions for their controller. For visual learners, video tutorials and setup templates are available to simplify the programming process.
Irritrol also provides access to CAD drawings and technical specifications for advanced users and professionals. The customer support team is reachable via phone (1-800-634-TURF) or email (irrigationsupport@irritrol.com) for personalized assistance. Community forums and irrigation expert platforms further offer peer-to-peer advice and real-world insights.
Lastly, the manufacturer recommends consulting the Quick Setup Guide for initial installation and the user manual for in-depth programming instructions. These resources, combined with online support, ensure users can fully utilize their Rain Dial controller’s features while resolving any challenges efficiently.