
Welcome to the Honeywell Pro 5000 Installation Manual‚ your comprehensive guide for installing and configuring the FocusPRO 5000 Series thermostat. This manual provides step-by-step instructions‚ system requirements‚ and troubleshooting tips to ensure a smooth setup. Designed for HVAC professionals and DIY enthusiasts‚ it covers everything from pre-installation checks to advanced feature configurations‚ ensuring optimal performance and efficiency for your heating and cooling systems.
Overview of the Honeywell Pro 5000 Thermostat
The Honeywell Pro 5000 is a non-programmable digital thermostat designed for simplicity and efficiency. It features a large backlit display showing both room and set temperatures‚ making it easy to read. The thermostat supports 2-heat and 1-cool stages and can be powered by batteries or system power. With Red-LINK wireless technology‚ it allows for flexible installation and integration with zoning systems. The Pro 5000 is compatible with various HVAC systems‚ including heat pumps‚ and offers reliable performance for residential heating and cooling needs. Its compact design and user-friendly interface ensure seamless operation.
Importance of Using the Installation Manual
Using the Honeywell Pro 5000 installation manual ensures safe and correct installation‚ preventing potential damage to the thermostat or HVAC system. It provides crucial safety precautions and step-by-step guidance for optimal performance. The manual helps configure advanced features like Red-LINK wireless technology and zoning integration‚ ensuring efficiency and proper system setup. It also aids in troubleshooting common issues and maintaining warranty validity. Following the manual guarantees compliance with local regulations and promotes energy efficiency‚ extending the device’s longevity and maximizing feature utilization for enhanced home comfort and energy savings.
System Requirements and Compatibility
The Honeywell Pro 5000 is compatible with 2-heat and 1-cool stage systems‚ supporting both battery and system power. It works seamlessly with Red-LINK wireless technology for enhanced connectivity and is designed to integrate with various HVAC configurations‚ ensuring optimal performance and energy efficiency across different setups.
Supported Heating and Cooling Systems
The Honeywell Pro 5000 thermostat is compatible with a variety of heating and cooling systems‚ including 2-stage heating and 1-stage cooling configurations. It supports conventional HVAC systems‚ heat pumps‚ and dual-fuel setups‚ ensuring versatility for different home environments. The thermostat also works with emergency heat systems‚ providing reliable temperature control during extreme conditions. Its compatibility extends to both battery-powered and hardwired systems‚ making it adaptable to various installation scenarios while maintaining energy efficiency and performance.
Power Requirements for the Thermostat
The Honeywell Pro 5000 thermostat operates on either battery power or system power. It requires 2 AA alkaline batteries for battery-powered operation‚ ensuring reliable performance without hardwiring. For systems with a 24V AC power source‚ the thermostat can be hardwired‚ eliminating the need for battery replacement. Both power options provide consistent functionality‚ with batteries offering flexibility during installation and system power ensuring continuous operation. This dual-power capability makes the Pro 5000 adaptable to various HVAC setups while maintaining energy efficiency and user convenience.
Pre-Installation Checklist
Ensure power is off. Gather tools: screwdriver‚ voltage tester‚ and pliers. Verify system compatibility. Prepare mounting location. Have installation manual ready. Follow all safety precautions.
Tools and Materials Needed
To ensure a successful installation‚ gather the following tools and materials: a screwdriver (Phillips and flathead)‚ voltage tester‚ pliers‚ wire strippers‚ and a drill with bits. Materials include mounting screws‚ wall anchors‚ and a level. For wiring‚ have 18-20 AWG cables ready. Ensure the thermostat and wallplate are included in the packaging. Additionally‚ a battery holder and extra batteries may be required. Having all components prepared will streamline the installation process and minimize delays. Refer to the manual for specific recommendations tailored to your system configuration.
Preparing the Site for Installation
Before starting‚ ensure the installation area is clear of debris and obstructions. Turn off the power to the HVAC system at the circuit breaker. Remove the existing thermostat and disconnect the wires‚ labeling them for reference. Mark the wall for the new wallplate‚ ensuring it is level and aligned properly. Clean the area around the installation site to prevent dust interference. Verify that all tools and materials are within reach. This preparation ensures a safe and efficient installation process for the Honeywell Pro 5000 thermostat.

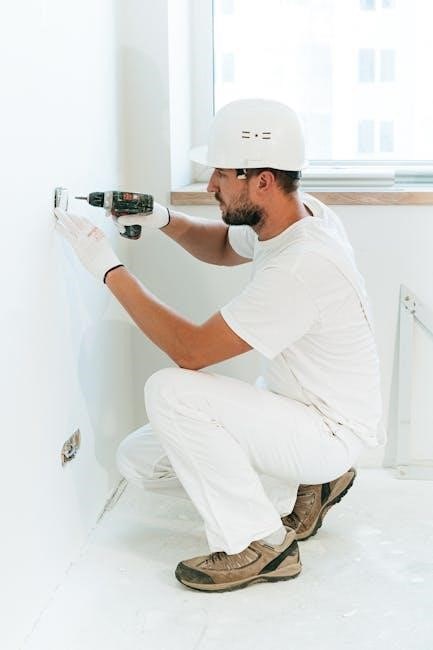
Installation Process
The Honeywell Pro 5000 installation involves removing the old thermostat‚ mounting the wallplate‚ connecting wires‚ and installing the new unit. Follow step-by-step instructions for a seamless setup.
Removing the Old Thermostat
Start by turning off the power to your HVAC system at the circuit breaker. Carefully detach the old thermostat from the wallplate by gently pulling it away. If screws hold it in place‚ remove them using a screwdriver. Once the thermostat is removed‚ label the wires to ensure proper identification during the new installation. Disconnect the wires from the old thermostat and pull them through the wire hole in the wallplate. This step ensures a smooth transition to installing the Honeywell Pro 5000 thermostat without damaging the wiring or system.
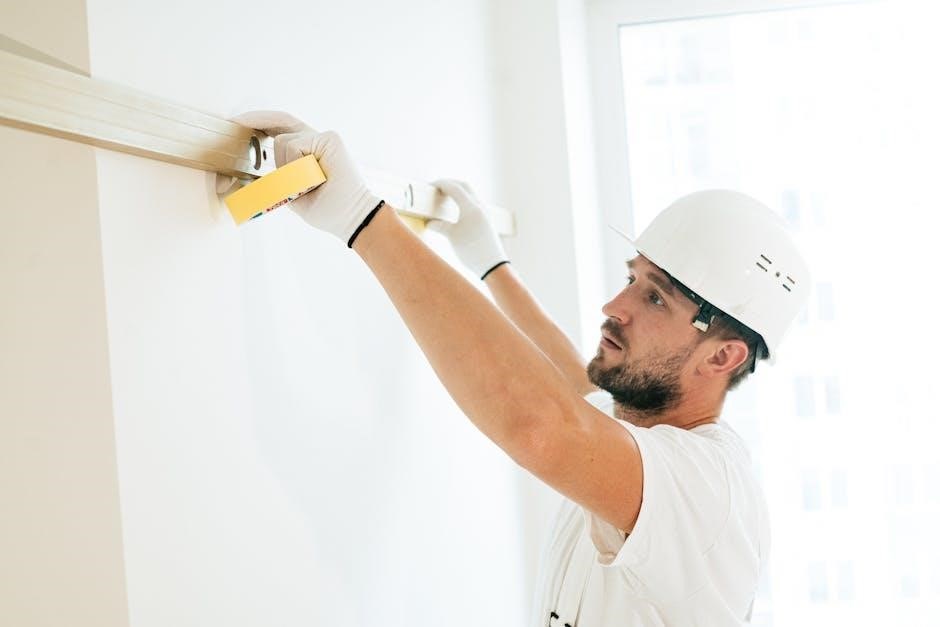
Mounting the Wallplate
Position the wallplate on the wall‚ ensuring it is level‚ and mark the screw holes. Remove the wallplate and drill pilot holes if necessary. Reattach the wallplate using screws provided‚ ensuring it is securely fastened. Pull the wires through the wire hole and connect them to the appropriate terminals. This step ensures the wallplate is properly installed and ready for the thermostat unit. Follow the manual’s guidelines for different wall types and use the correct fasteners to avoid damage. Double-check the connections before proceeding to ensure everything is secure and correctly aligned. This process sets the foundation for a successful installation of the Honeywell Pro 5000 thermostat.
Connecting the Wires
After mounting the wallplate‚ carefully pull the wires through the wire hole and connect them to the appropriate terminals on the wallplate. Match the wire labels (e;g.‚ R‚ W‚ Y‚ G‚ C) to the corresponding terminals. Ensure all connections are secure and tightened properly. If using a common wire‚ connect it to the C terminal. Double-check the wiring configuration to avoid errors. Refer to the manual for specific wiring diagrams and terminal assignments. Proper wire connections are critical for the thermostat’s functionality and system performance. Always turn off power before handling wires to prevent electrical hazards.
Installing the Thermostat Unit
Once the wallplate is mounted and wired‚ attach the thermostat unit by aligning it with the wallplate and gently snapping it into place. Ensure the thermostat is securely fastened. Insert the batteries or connect system power‚ following the polarity indicators to avoid damage. After installation‚ turn the power on at the circuit breaker and allow the thermostat to initialize; Verify the display lights up and functions correctly. Proper installation ensures accurate temperature control and system performance. Double-check all connections before finalizing the setup.
Configuration and Setup
Configure system type‚ stages‚ and enable advanced features. Press and hold the buttons to start setup. Customize features as needed for optimal performance.
Setting Up the Thermostat
To set up the Honeywell Pro 5000 thermostat‚ begin by pressing and holding the “s” and “FAN” buttons until the display changes. This initiates the installer setup mode. Navigate through the menu to select your system type‚ such as 2-heat or 1-cool stages‚ and configure options like emergency heat. Use the arrow keys to adjust settings and press “Done” to save. Ensure the thermostat is powered either by batteries or system power for continuous operation. Refer to the manual for detailed instructions on customizing features like temperature limits and scheduling for optimal performance.
Configuring System Type and Stages
Configuring the system type and stages ensures the Honeywell Pro 5000 thermostat operates correctly with your HVAC system. In installer setup‚ select the system type (e.g.‚ 2-heat‚ 1-cool‚ or heat pump) using the arrow keys. Choose the number of stages (2 heat stages or 1 cool stage) based on your system. For multi-stage systems‚ ensure the wiring matches the selected configuration. After configuring‚ press “Done” to save settings. This step is critical for proper system operation and energy efficiency. Refer to the manual for specific configurations and verification steps.
Enabling Advanced Features
To enable advanced features on the Honeywell Pro 5000 thermostat‚ navigate to the installer setup menu by pressing and holding the “FAN” and “button” until the display changes. From there‚ access the advanced settings to enable options like Red-LINK wireless technology for remote system control and zoning integration. These features enhance system performance and flexibility. Use the touchscreen interface to configure settings like wireless communication and multi-zone control. Ensure all advanced features are properly enabled to maximize the thermostat’s functionality and compatibility with your HVAC system. Refer to the manual for detailed configuration steps.
System Testing
After installation‚ test the heating‚ cooling‚ emergency heat‚ and fan functions to ensure proper operation. Follow the manual’s detailed procedures for each system test.
Testing Heating and Cooling Systems
Perform a thorough test of the heating‚ cooling‚ and emergency heat systems to ensure proper operation. Follow the manual’s step-by-step guide to activate each system mode‚ verifying temperature changes and operational consistency. Check for smooth transitions between heating and cooling stages‚ and ensure the emergency heat function engages correctly when required. These tests confirm the system’s compatibility with the Honeywell Pro 5000 thermostat and ensure reliable performance. Always refer to the manual for specific testing procedures tailored to your system type and configuration.
Verifying Emergency Heat Functionality
After installation‚ verify the emergency heat functionality to ensure it operates correctly. Access the installer test mode and select the emergency heat option to activate it. Check if the system responds by turning on the emergency heat source. Monitor the thermostat display for confirmation and ensure there are no error messages. This step confirms the emergency heat system is properly configured and functional‚ providing reliable backup heating when needed. Proper verification ensures the system operates as intended during critical heating demands.
Checking Fan Operation
To ensure proper fan operation‚ navigate to the test mode in the Honeywell Pro 5000 thermostat. Press and hold the ‘FAN’ and ‘SET’ buttons to access the installer setup. Select the ‘Fan Test’ option to activate the fan and observe its operation. Verify that the fan runs smoothly and consistently. If the fan does not operate‚ check the wiring connections and ensure they match the diagram in the manual. Also‚ confirm the correct fan mode (‘Auto’ or ‘On’) is selected. Proper fan operation is crucial for system efficiency and comfort.
Troubleshooting Common Issues
Identify and resolve common issues like display malfunctions or communication errors. Check wiring connections‚ ensure proper power supply‚ and refer to the manual for detailed troubleshooting steps.
Resolving Wiring and Connection Problems
Wiring issues are common during installation. Ensure all connections are secure and match the system requirements. Verify wire labels (R‚ W‚ Y‚ G‚ C) are correctly connected. Check for loose wires or damage. If the thermostat doesn’t power on‚ confirm 24V AC power is present at the R and C terminals. Consult the manual for specific wiring diagrams tailored to your HVAC system. Use the system test guide to verify functionality after corrections. Proper wiring ensures reliable operation and prevents system malfunctions.
Addressing Display and Communication Issues
If the display is blank or unresponsive‚ ensure the thermostat is properly powered. Check for loose wires or incorrect connections‚ especially at the R and C terminals. For communication issues with Red-LINK wireless models‚ verify the system is configured correctly. Restart the thermostat by removing and reinstalling the batteries or resetting the power. Ensure the wireless network is operational and within range. Consult the manual for troubleshooting steps or perform a factory reset if issues persist. Correct display and communication are essential for optimal thermostat performance and system control.
Advanced Features and Customization
The Honeywell Pro 5000 offers advanced features like Red-LINK wireless technology for seamless system integration and zoning capabilities‚ allowing tailored temperature control across multiple zones efficiently.
Red-LINK Wireless Technology
Red-LINK Wireless Technology enhances the Honeywell Pro 5000’s functionality by enabling wireless communication between system components. This feature allows for easy relocation of the thermostat‚ simplifies adding zoning systems‚ and supports upgrades without additional wiring. It ensures reliable communication‚ reducing installation complexity and potential errors. With Red-LINK‚ users can integrate advanced features seamlessly‚ improving overall system performance and flexibility. This technology is a key advantage for creating a customizable and efficient heating and cooling setup.
Zoning System Integration
The Honeywell Pro 5000 supports seamless integration with zoning systems‚ enabling precise temperature control across multiple zones. This feature allows users to customize comfort levels in different areas of their home or building; By connecting to compatible zoning controllers‚ the thermostat optimizes energy efficiency and ensures consistent temperatures. The system simplifies installations by supporting both wired and wireless configurations‚ making it adaptable to various HVAC setups. This integration enhances overall system performance and provides users with greater control over their environment.

Warranty and Support Information
The Honeywell Pro 5000 is backed by a 5-year warranty covering defects in workmanship and materials‚ excluding the battery. Contact Honeywell Support through their website or hotline for assistance.
Product Warranty Details
Honeywell warrants the Pro 5000 thermostat to be free from defects in workmanship and materials for five years from the date of purchase. This warranty excludes the battery and applies under normal use and service conditions. The product must be installed and operated in accordance with the instructions provided in the manual. For warranty validation‚ ensure the product is registered with Honeywell. Any repairs or replacements under warranty will be handled by Honeywell or an authorized service provider‚ ensuring continued reliability and performance of your thermostat.
Contacting Honeywell Support
For assistance with the Honeywell Pro 5000 thermostat‚ visit Honeywell’s official website to access support resources. You can reach Honeywell’s customer service team via phone or email for troubleshooting‚ warranty inquiries‚ or technical help. Additionally‚ downloadable manuals and FAQs are available online to address common questions and installation challenges. Ensure to have your product details ready for efficient support.
The Honeywell Pro 5000 installation process is now complete. Ensure all systems operate efficiently and perform regular maintenance for optimal performance and longevity of your thermostat.
Final Checks and Verification
After installation‚ perform final checks to ensure proper functionality. Test heating‚ cooling‚ and fan operations to confirm they work as intended. Verify the thermostat display shows accurate temperatures and system status. Check all wire connections for security and correctness. Ensure the Red-LINK wireless technology (if applicable) is operational. Review the system configuration to match your heating/cooling setup. Lastly‚ confirm that the emergency heat function and zoning integrations (if enabled) are functioning correctly. Schedule regular maintenance to uphold performance and efficiency.
Best Practices for Ongoing Maintenance
Regularly clean the thermostat display and sensors to ensure accurate temperature readings. Check and replace batteries annually to prevent system downtime. Update firmware when available to access new features and improvements. Inspect wiring connections to avoid loose or corroded links. Schedule annual HVAC system maintenance to ensure optimal performance. Recalibrate the thermostat if temperature readings seem off. Refer to the manual for detailed care instructions to maintain efficiency and extend the product lifespan.